Guide to getting you started
This guide will walk you through the steps of settings up a client and connecting to one of our servers.
Getting a client
This part of the guide will walk you through setting up a client. If you already have your own environment that can load Fabric mods, you may skip this part. The client side mod is not required if you can't be bothered with it, but people will look awfully boring without their own skins.
Step 1. Installing Adoptium JVM (Windows)
For some reason Oracle doesn't make their own new versions of Java and restrictive licences likely prevent Mojang and Prism from distributing their own, so we're going to have to download one ourselves. This part may only apply to Windows, I'm not sure how it would go on macOS and I can't be bothered to test on Linux distributions so you might have to improvise for this step.
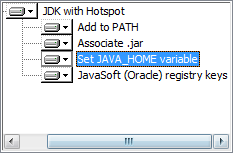
Click on the "Latest LTS Release" download button and install it. Make sure the installer is set to install Set JAVA_HOME variable and JavaSoft (Oracle) registry keys or you will have issues later on. Just pick always install for everything.
Step 2. Downloading Prism Launcher
Prism Launcher is the latest in a series of MultiMC forks and currently the most well maintained one, so that's the launcher we're currently recommending. If you plan to use our client side mod, we recommend using a dedicated instance for it so you won't have to turn it off when connecting to other servers as will cause issues when trying to connect to them.
Which installer or package you grab doesn't matter. Install it or extract the zip somewhere and launch Prism Launcher.exe or any of the shortcuts it placed.
The first time you start it you'll be asked to pick a language and what version of Java to use.
If you properly followed the previous step the Adoptium JVM should be immediately selected.
If you did not properly follow the previous step, the path of the javaw.exe should be something among the lines of C:/Program Files/Eclipse Adoptium/jdk-17.0.8.7-hotspot/bin/javaw.exe.
During the next step of the Quick Setup, make sure to select Background Cat (from MultiMC) because he's epic.
You should now be at the main screen of Prism Launcher!
Step 3. Adding your account
This step varies depending on whether you have a currently active Minecraft account or not. The whole point of our server side mod is to provide people who chose to not convert/link their Mojang account to a Microsoft account with the ability to still play the game they paid for.
If you have a Microsoft account
In the top right of the main screen, click the Accounts button and pick Manage Accounts.... If you have Minecraft linked to your Microsoft account, press Add Microsoft and follow the steps to logging in.
Close the settings window and your Minecraft username and skin should now show up where it previously said Accounts.
If you do not have a Microsoft account
One annoying restriction Prism Launcher has is that it does not allow you to add Offline profiles without having a Microsoft or Mojang account added first. To circumvent this, you'll first want to close Prism Launcher.
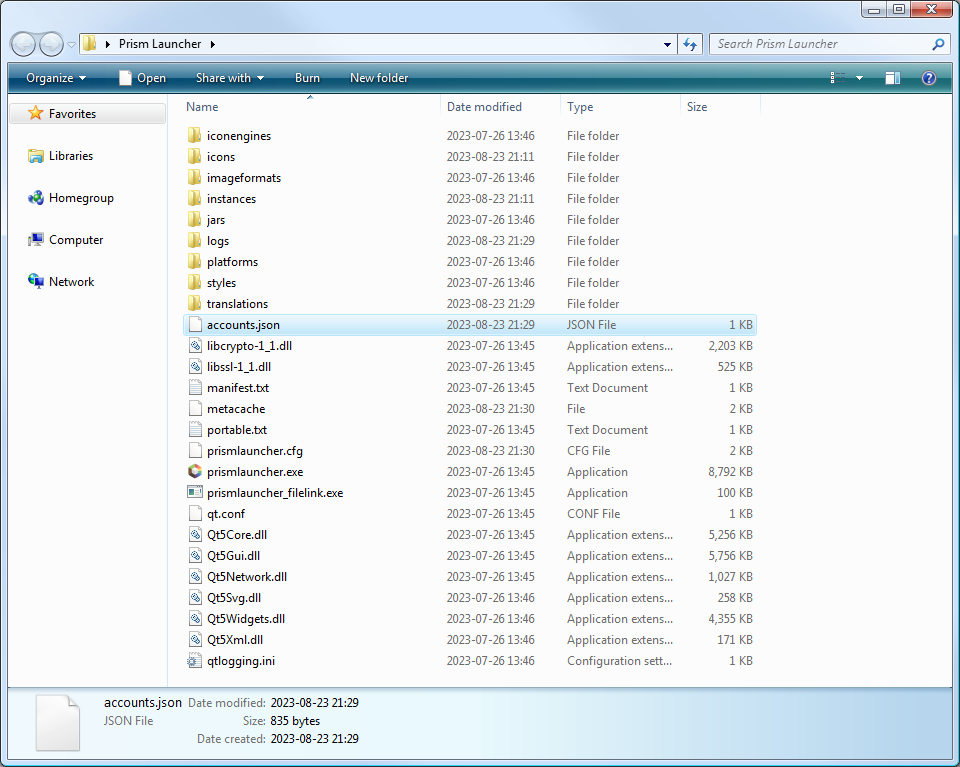
If you used the Portable option when downloading, go to the folder than contains Prism Launcher.exe.
If you used the Installer option, press Windows Key+R to open the Run Dialog, put %appdata%\PrismLauncher in the Open field and hit OK or press the Enter key.
Once there you'll want to download accounts.json to that folder.
When you've done that start Prism Launcher again and you should notice that the button in the top right that previously said Accounts now says Anonymous.
Press the button that says Anonymous, pick Manage Accounts... and then press Add Offline on the right of the new window that popped up.
Pick a username, whether its your old Minecraft account name, your username on Flashii or something entirely different but still identifiable as you and press OK.
I have not tested whether the Allow long usernames option works with our servers but I also can't be bothered to try.
Now select the name you've just added in the list, press Set Default on the right side.

Close the settings window and your Minecraft username should now show up where it previously said Anonymous.
At the time of writing Add Mojang still shows up as an option, but as far as I'm aware it doesn't work anymore but you can try it if you want to and haven't converted to a Microsoft account yet.
Step 4. Setting up an instance
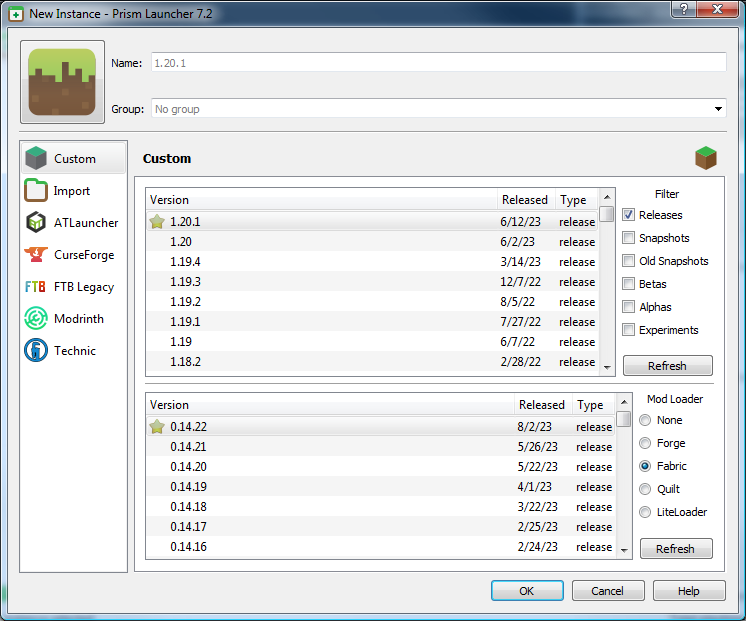
Press the Add Instance button on the top left.
Under Custom make sure the version the server you want to connect to is currently running is selected. The versions of the servers are listing on the home page along with their addresses for your convenience.
If you plan on using our client side mod, select Fabric under Mod Loader and just pick whatever the latest version is, which is also what should be selected by default.
When you've done those things, press OK.
Step 5. Installing the Flashii Extensions client side mod (Optional)
You can download the Flashii Extensions mod from the downloads page, the latest version of the mod is the first thing linked in the list. Save it anywhere you like as long as you remember where you saved it.
Back in the main window of Prism Launcher, select the instance you've just created and then pick Edit in the menu on the right side of the window.
Select Mods in the sidebar, pick Add File, browse to the .jar file you just downloaded and press Open.
Now close this window or Launch the game from here.
Step 6. Launching the game
You should now have a fully functional basic instance to connect to our servers! From now on you can just launch this instance by double clicking it or selecting Launch from the sidebar.
Connecting to a server
We're assuming you've already picked a server to play from from the home page and have added it to your server list.
First time connecting
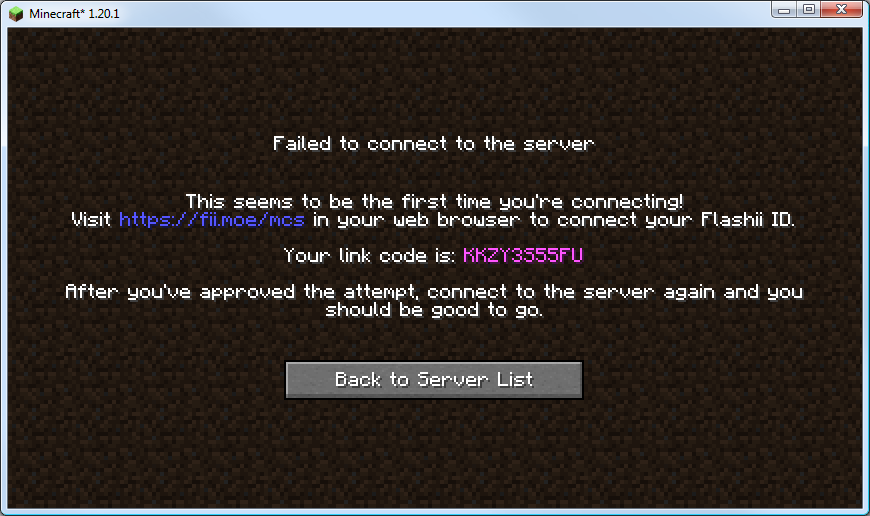
The first time you connect to the server you'll be met with a message telling you to connect your Flashii ID. Follow the steps provided in the message, unfortunately Minecraft does not allow you to copy text or click links from this screen so you'll have to type out the URL and code yourself.
If you're not logged in to Flashii yet in your web browser you'll have to do that first.
Enter the code displayed in purple in the Link Code field on the website and press enter.
You should now be greeted with more options on the website like the client list and the ability to upload a skin. You'll also notice that a client in the list has already been authorised, you should now be able to connect to the server!
Subsequent times connecting
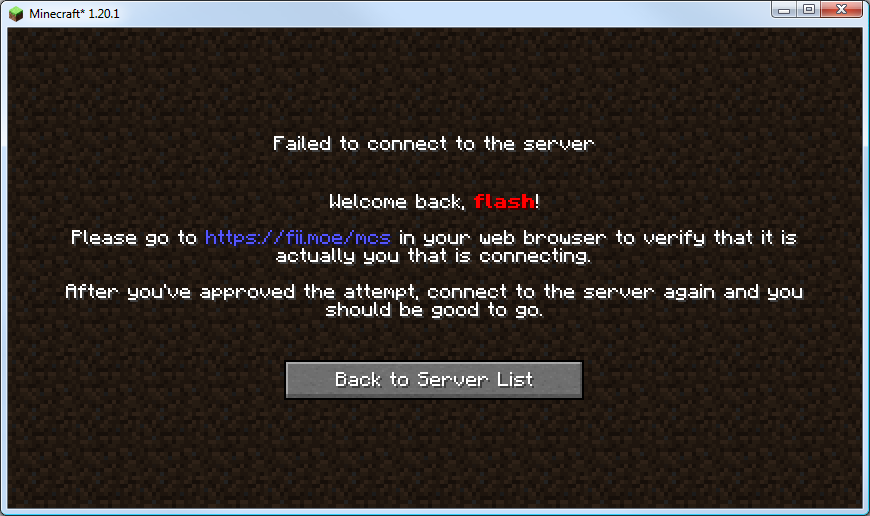
Provided your IP address remains unchanged, you should be able to connect to the server without issue. If you IP address does change you'll be met with a notice telling you to verify that you actually you.
Again go to the URL displayed in blue in your web browser and then press Authorise on your client. Only approve clients with IP addresses that you recognise otherwise someone will be able to impersonate you, for your own convenience your current IP address is displayed at the top of the page, usually this should be the same as your client so you can easily identify which one approve. Press Deny or use the Deny pending clients under the Crowd Control header to remove ones you don't recognise. Also make sure to deauthorise any clients that you don't use anymore, like your previous IP address that caused you to have to go back to this page in the first place.
You should now be able to connect to the server again until your IP address changes again!